 Heft
HeftTutorial: your first cleanup
This walks you through a first session with Heft: scanning a drive, reading the map, acting on suggestions, deleting safely and clearing caches. It takes about ten minutes.
The steps show Windows. macOS and Linux work the same way unless a step says otherwise. The disk screenshots use Heft's demo disk, so the files in them are made up.
1Download and open Heft
Go to the latest release and download the file for your system. Heft is a single program with no installer.
- Windows 10 and 11: unzip
heft-<version>-windows-x86_64.zipinto any folder and runheft.exe. - macOS 11 and later: unzip
heft-<version>-macos-universal.zipand move Heft to Applications. - Linux: extract
heft-<version>-linux-x86_64.tar.gzand run./heft. Runbash scripts/install-linux.shin the same folder to add Heft to your app launcher.
A warning the first time is expected. The downloads aren't code-signed yet. On Windows, "Windows protected your PC" appears: click More info, then Run anyway. On macOS, open System Settings > Privacy & Security and click Open Anyway. See the FAQ if Windows doesn't offer that choice.
2Scan a drive
The start screen asks what's filling your disks and lists your drives with their free space. Click one to scan it, or choose Scan a folder to look at just one folder. You can also drop a folder onto the window.
On Windows, Heft offers to Restart as administrator. Take it if you can: as administrator on an NTFS drive, Heft reads the drive's master file table directly, which takes seconds instead of minutes. Without it, Heft scans folders in parallel. That works everywhere, just more slowly.
While it scans you see how many folders it has read, the size so far and the time taken.
3Read the map
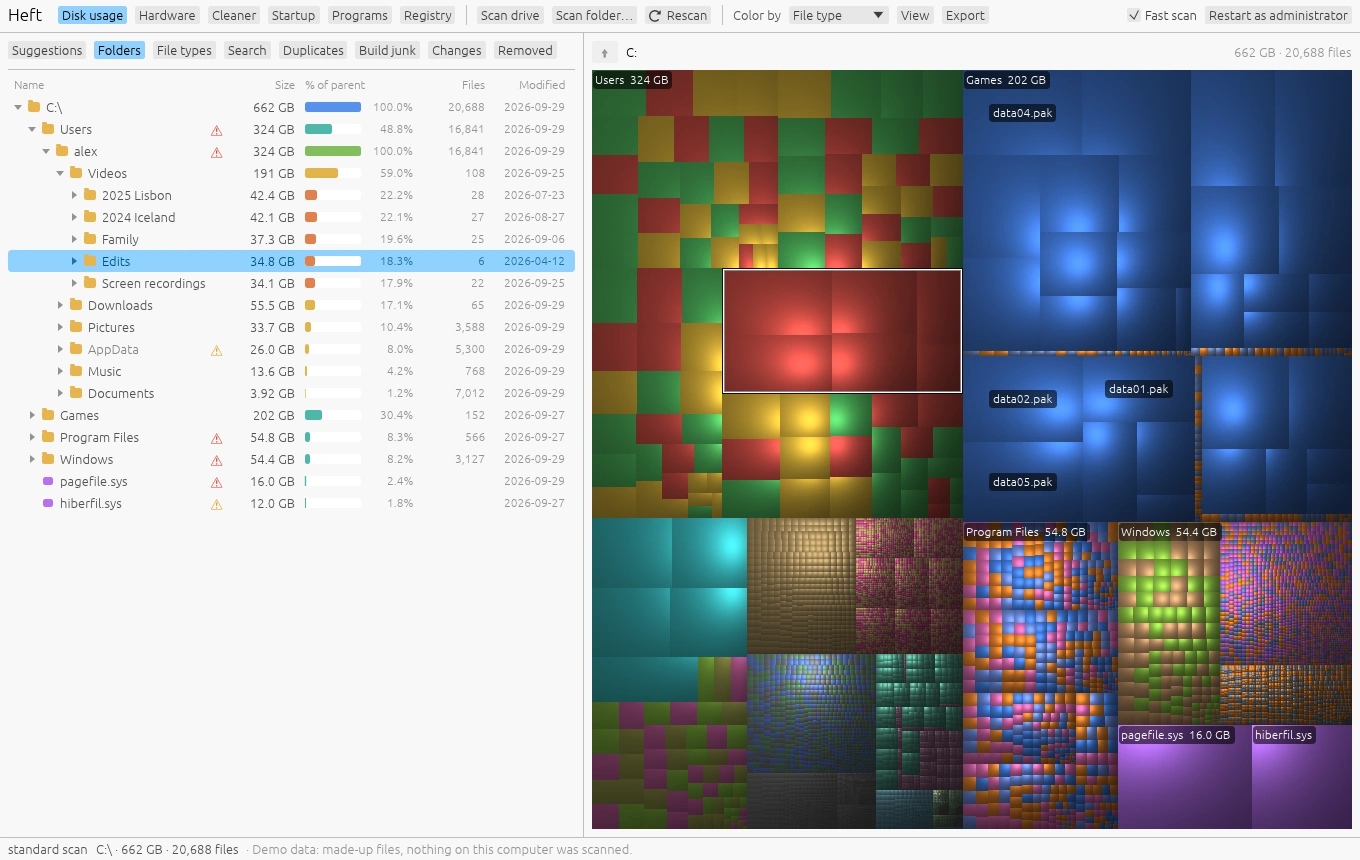
The treemap on the right shows every file as a rectangle. The bigger the rectangle, the more space the file takes. Files in the same folder sit together, shaded like a cushion, so large folders stand out as blocks. The biggest rectangles are labeled.
- Click a rectangle to select it. The folder tree jumps to it.
- Double-click or press Enter to zoom into a folder. Backspace or the mouse back button zooms out.
- Hover over anything to see its path and size.
The Folders tab on the left lists the same folders with their size, share of the parent folder, number of files and the date anything inside last changed. Folders are sorted biggest first, so the answer to "where did my space go" is usually in the first few rows.
Try Color by > Age in the toolbar. Recent files turn warm, old ones turn cool, and forgotten corners of the drive become easy to see.
4Start with Suggestions
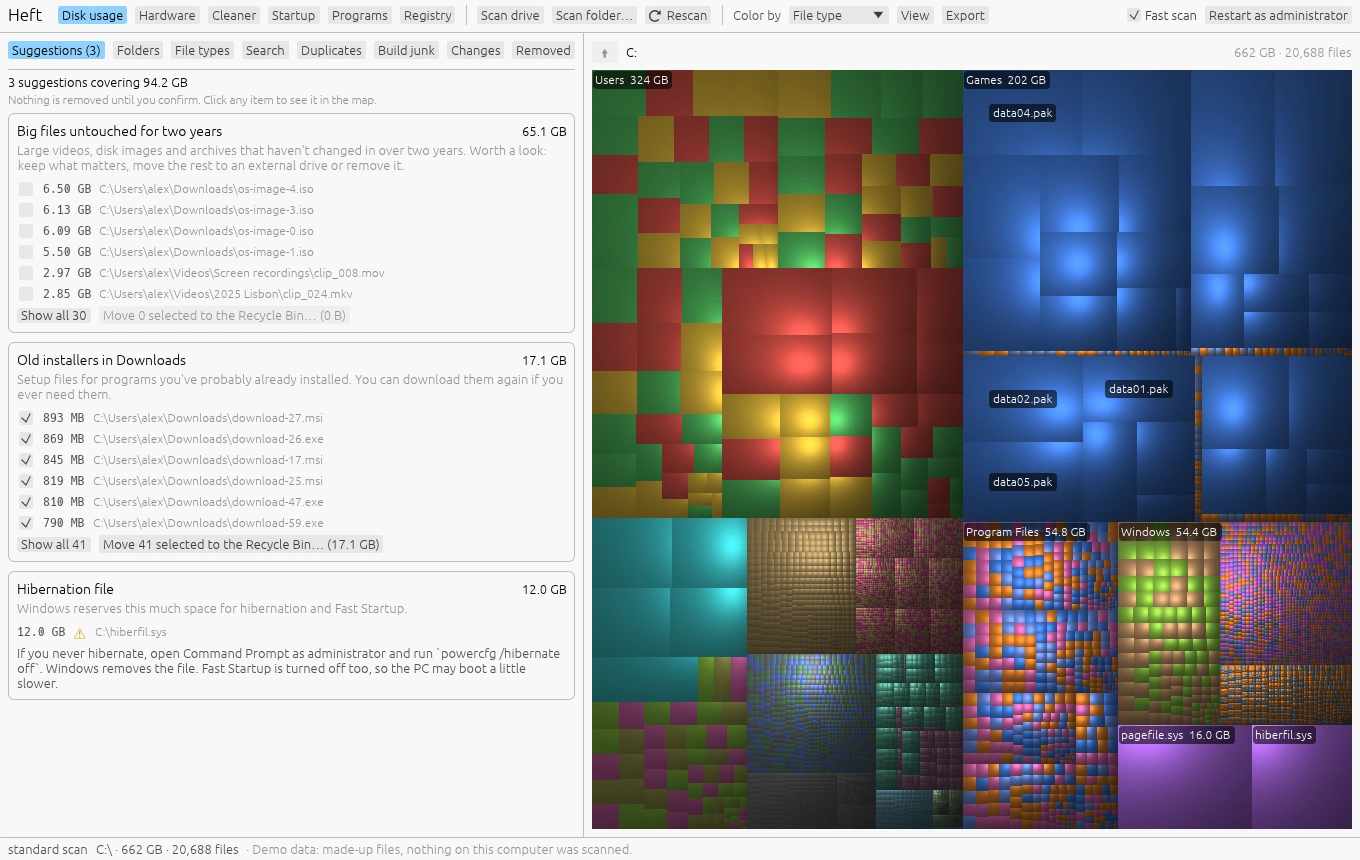
Open the Suggestions tab. Heft goes through the scan and lists things that are usually safe to remove: old installers in Downloads, build folders in projects you haven't touched in six months, Steam games you haven't played in a year, huge logs and crash dumps, and big files nobody has opened in years.
- Only clearly disposable items are ticked for you. Everything else you tick yourself.
- Click any item to see it in the map before you decide.
- Press Move selected to the Recycle Bin when you're happy with the selection.
Some suggestions aren't things Heft deletes. The hibernation file and a leftover Windows.old folder, for example, come with the steps to remove them with Windows' own tools, because that's the safe way to do it. On a Mac, iPhone backups and Time Machine's local snapshots work the same way.
5Look for big files yourself
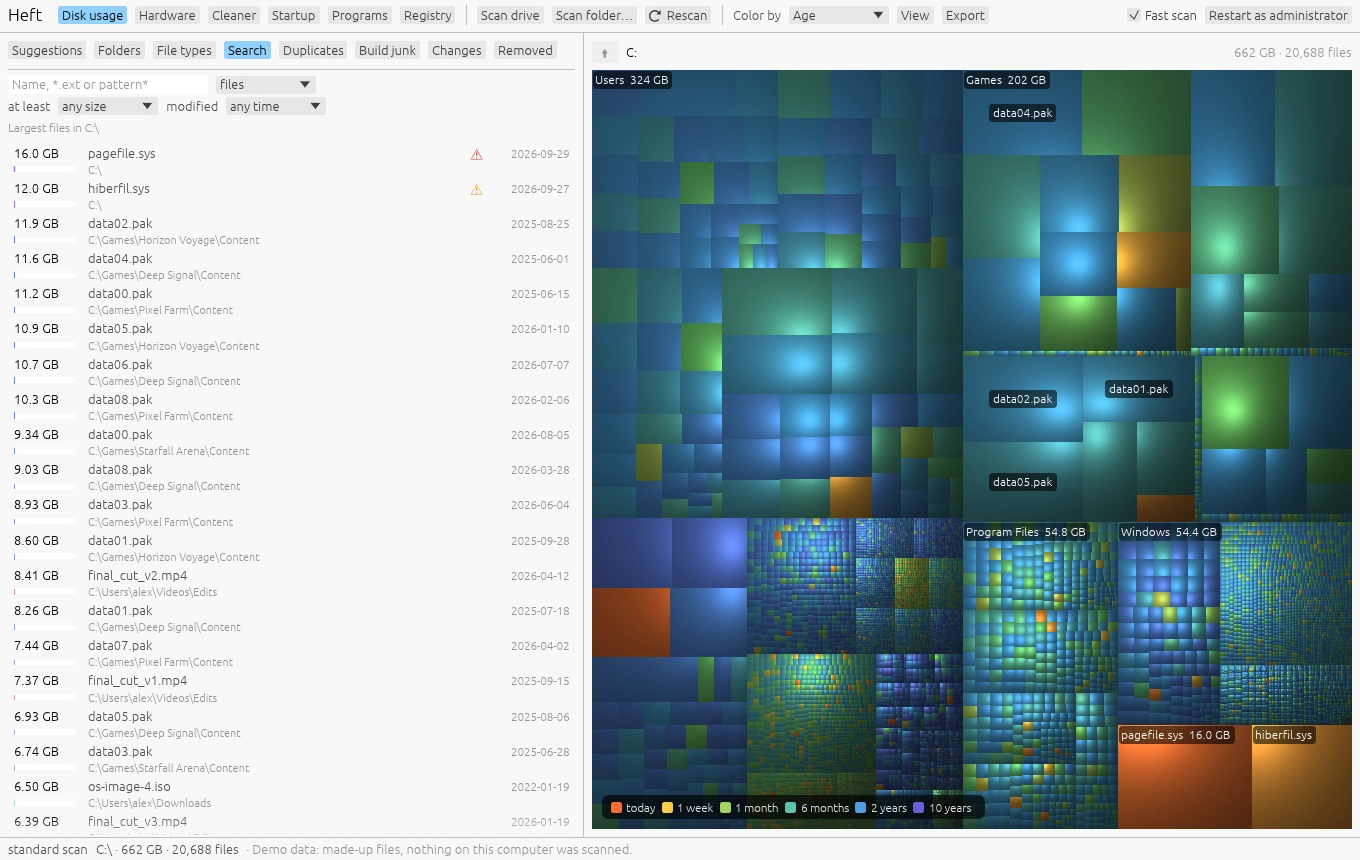
The Search tab starts out as a list of the largest files. Narrow it down:
- Type part of a name, an extension such as
.iso, or a pattern such asbackup*. - Set at least to 1 GB and modified to "over a year ago" to find big files you've forgotten about.
- Everything that matches can go to the Recycle Bin in one step.
The File types tab adds up space by kind of file (video, games, programs, archives) and by extension. Click a row to light those files up in the treemap.
6Delete safely
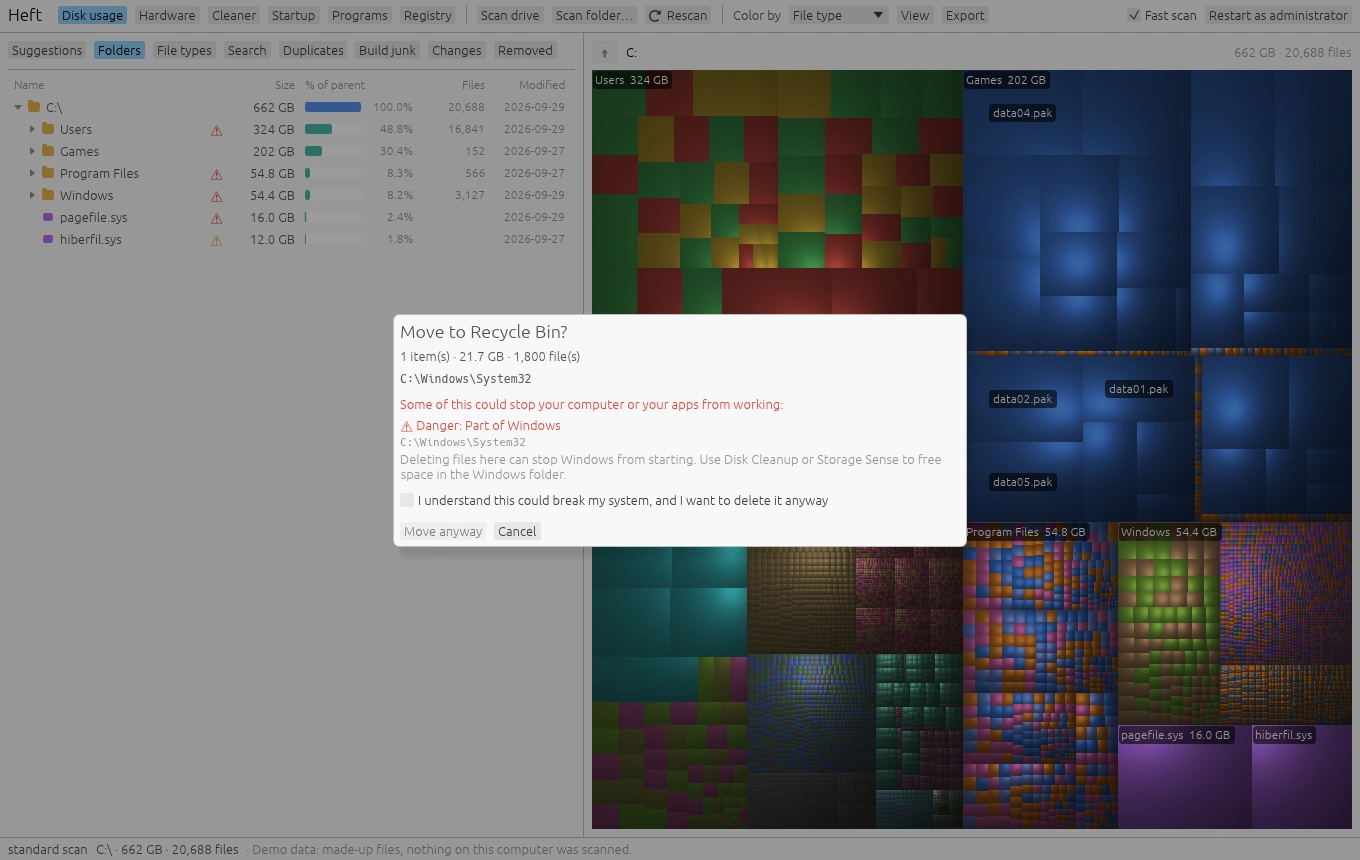
To remove something, right-click it and choose Move to Recycle Bin, or select it and press Delete (Cmd+Backspace on a Mac). Heft always asks first and shows how many files and how much space are involved.
Look out for the warning triangles in the tree. Heft marks system folders, installed programs, app data, cloud-synced folders, keys, mailboxes and saved games, and explains what could go wrong if you delete them. A red warning means the computer might not start afterwards; you have to tick a box to go ahead.
Files go to the Recycle Bin or Trash, not straight into oblivion. The space comes back when you empty it.
7Put something back
Deleted the wrong thing? The Removed tab lists everything Heft has moved to the Recycle Bin or Trash. Select items and press Put back, then rescan to see them in the map again. On a Mac, items removed with an earlier version of Heft have to be put back from Finder: open the Trash, right-click an item and choose Put Back.
8Clear caches with the Cleaner
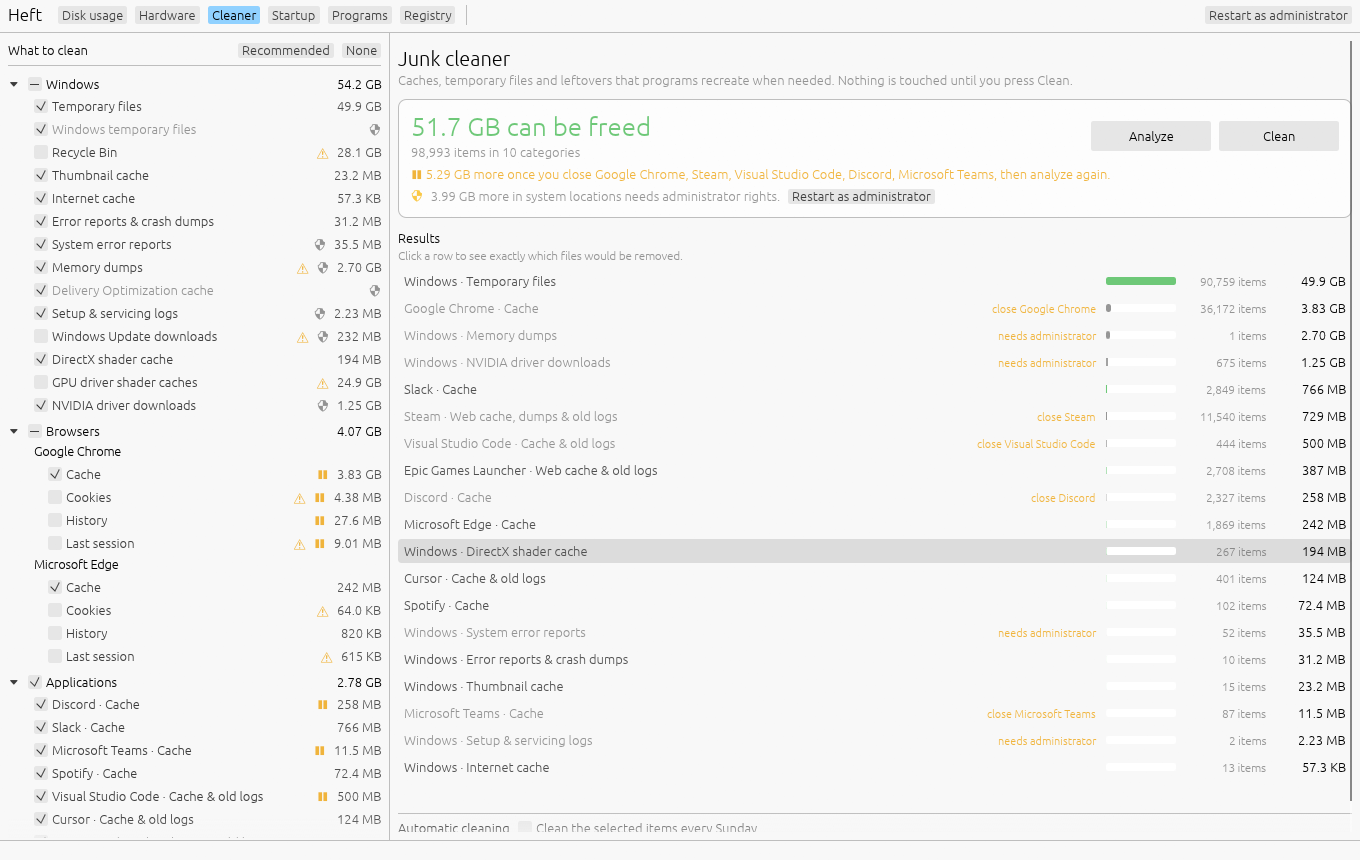
Switch to the Cleaner page at the top. It checks a fixed list of known cache and temporary-file locations for your system, browsers and apps, and shows how much each would free.
- Click a row in the results to see exactly which files would be removed.
- A program that's running is skipped. Close it and press Analyze again to include it.
- Recommended resets the selection to caches and temporary files only. Cookies and history are never ticked for you.
- On a Mac, items that need your administrator password are marked 🛡. Heft cleans everything else first, then macOS asks for the password once, at the end.
Press Clean when you're ready. These files are deleted rather than recycled, because programs rebuild them anyway, and the confirmation says so.
9Keep it tidy
You're done with the big cleanup. A few things help keep it that way:
- Scan again in a few weeks. Heft saves a small snapshot after every scan, and the Changes tab shows which folders grew since. See Changes over time.
- Turn on free space alerts in the View menu to get a notification when a drive is nearly full. See Free space alerts.
- Schedule the Cleaner to run every Sunday, on Windows or a Mac. See Weekly cleaning.
- Save space without deleting by replacing duplicates with links or compressing games you rarely update. See Duplicates and saving space.